
Cloud Storage; Your Way
A few years ago I had a conversation with a friend about using cloud storage for personal use. Mainly focusing on Google Drive, Box.com, OneDrive, etc to house all of your family’s data. Think about storing those treasured family photos that can be easily shared or even the important tax information you want to protect, yet have easily accessible. My friend happened to be another cyber security professional, so immediately our conversation turned into the implications and risks associated with storing your data in a stack (IaaS, PaaS, SaaS) you have zero control over.
The conversation then turned towards Nextcloud. This is a free open-source platform that give all of the control back to you. There’s even mobile and desktop clients, so you immediately get the same syncing and accessibility features of the aforementioned cloud storage services. With something like Nextcloud the possibilities become limitless. Run a server in your garage that hosts Nextcloud or stand up your own VPS in a cloud provider. The choice is yours!
In this post I’ll walk you through a very fast and simple example of standing up a VPS in AWS (using Lightsail), installing Nextcloud and doing some basic configurations, including a domain name setup and SSL certs.
Overview
- Create Linux VPS in AWS Lightsail and create S3 attached storage
- Install and configure Nextcloud
- Point your domain / subdomain to your VPS
- Create SSL certs and enable HTTPS
Assumptions
- You have an AWS account and basic knowledge using Lightsail
- You have some basic knowledge of the Linux operating system (we’ll be using Ubuntu 16.04 LTS)
- You already own a domain name and/or have a subdomain created
Considerations
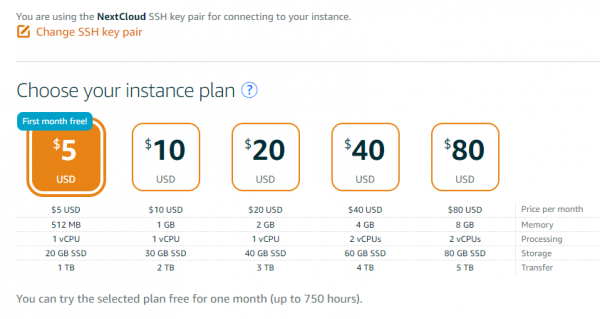
- Instances within AWS Lightsail range from $5 to $80 per month. These are fully ready VPS, so you might not need anything additional. However, the storage within these VPS’s range anywhere from 20GB to 80GB. This is designed to mainly be used for the system itself. Obviously if you’re wanting some cloud storage you would more than likely want a lot more storage. This is where the S3 attached storage will come into play. You will ideally pay $0.10 per GB per month for storage. So, 100GB will run you $10/month, plus the cost of the VPS.
- I’m not a fan of using AWS Lightsail’s web based console, it’s convenient, but I don’t use it. I always create unique SSH key pairs per instance and then use Putty to access the servers. I recommend you do the same.
Let’s get started
Part 1 – Create Linux VPS in AWS Lightsail and create S3 attached storage
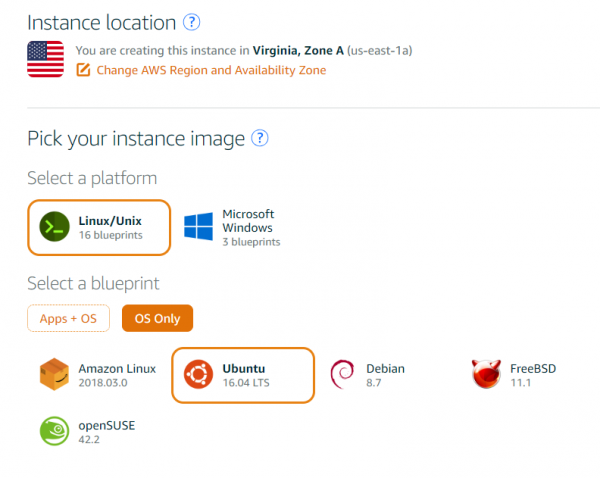
- Login to AWS and access the Lightsail service
- Create a new Linux instance, choose Ubuntu 16.04 LTS
- Your new instance will be fully provisioned within a couple minutes. As mentioned within the consideration, you have the ability to create or even upload your own SSH key. Authentication into Lightsail instance can only take place via SSH private keys.
- Once your VPS is up and running, go to the web console, Manage > Networking, and create a static IP address and attach it to the newly created instance.
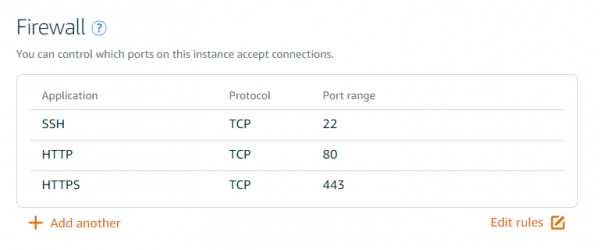
- Also, within the Networking settings, create a new firewall rule to allow TCP traffic over port 443, as towards the end we will be setting up an SSL cert.
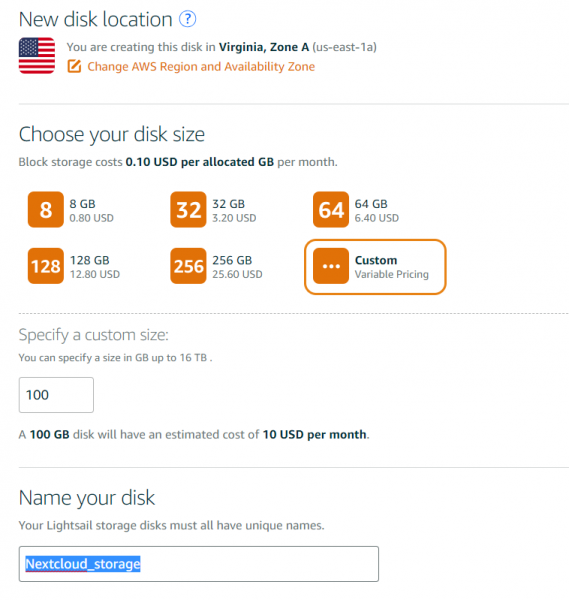
- Again, within the web console, Manage > Storage, create a new disk and attach it to your Nextcloud instance. In this example, I’m going to add an additional 100GB of attached storage. Couple things here to keep in mind: 1) make sure you choose the same zone for the disk as your instance; 2) choose whatever amount of storage you would like.
- At this point you have the entire infrastructure up and running and you’re ready to begin installing Nextcloud.
Part 2 – Install and configure Nextcloud
- From here on out, we’ll be entirely working directly on the server. Go ahead and connect to your server through the web based console or Putty.
- Update the server by running the following:
- sudo apt-get update
- sudo apt-get upgrade -y
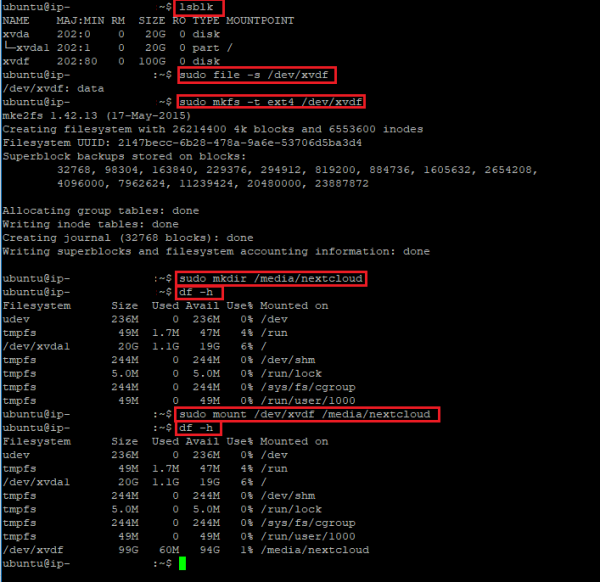
- Mount the additional disk we attached within the AWS web console. Run the following command to ensure your disk is correctly attached to the instance: lsblk
- Create a file system on the disk in order to mount it to the server. Ensure that to match the “/dev/xvdf” with your setup
- sudo file -s /dev/xvdf
- Create an ext4 file system on this disk
- sudo mkfs -t ext4 /dev/xvdf
- Create a new directory where we will mount the new disk to. This is important, make sure to create the new directory within the /media/ location.
- sudo mkdir /media/nextcloud
- Mount the new disk (with a file system) to the newly created directory.
- sudo mount /dev/xvdf /media/nextcloud
- Here’s all of the above commands in one screenshot. Notice how I ran the df -h before and after the actual mount, to ensure the server is aware of the new storage.
- One last thing we want to do is ensure the disk will re-mount every time the server reboots. First create a backup of your fstab file
- sudo cp /etc/fstab /etc/fstab.orig
- Open the fstab file
- sudo nano /etc/fstab
- Add the following line at the bottom of your fstab file
- /dev/xvdf /media/nextcloud ext4 defaults, nofail 0 2
- Next up, let’s install sanp
- sudo apt install snap
- Install the Nextcloud snap. This is the true power of snaps, this will containerize the entire stack needed to run Nextcloud, including MySQL, PHP, Apache, etc.
- sudo snap install nextcloud
- Install Nextcloud and create initial admin account and password. Ideally this first account will be your account. Replace the values below with your account name and password
- sudo nextcloud.manual-install <admin account> <admin password>
- Configure the trusted domains in which you plan to access the your new cloud storage. Ideally, you would need to figure the public IP address and the domain you intend to setup later.
- Open the config file with your editor of choice
- sudo nano /var/snap/nextcloud/current/nextcloud/config/config.php
- By default, the only trusted domain is localhost. So, you do want to add you public IP address for the your instance and the domain or sub-domain name you intend to use later. Here’s an example of what you should be adding to the config:
- ‘trusted_domains’ => array (0 => ‘localhost’, 1 => ‘8.8.8.8’, 2 => ‘yourdomain.com’,),
- Restart the Nextcloud Snap
- sudo snap restart nextcloud
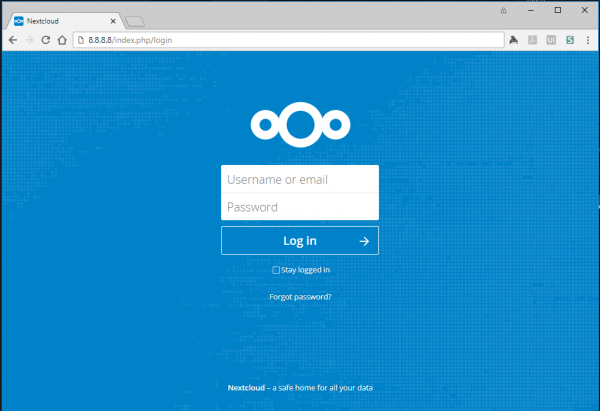
- At this point you should be able to navigate to Nextcloud using your public IP address. Go out to your site to ensure everything I loading correctly and even log in with your admin account you created earlier.
- After logging in and confirming everything looks good, next we want to change the default data directory from within the containerized snap of Nextcloud to the disk we mounted earlier.
- Back on the server, allow your Nextcloud snap to have access to the /media directory, remember we mounted the additional disk within this directory path.
- sudo snap connect nextcloud:removable-media
- Following this guide, we’re wanting to change the default data directory from /var/snap/nextcloud/common/nextcloud/data to /media/nextcloud/data (where our additional 100GB of storage lives).
- Open the Nextcloud config with editor of choice
- sudo nano /var/snap/nextcloud/current/nextcloud/config/config.php
- Replace ‘datadirectory’ => ‘/var/snap/nextcloud/common/nextcloud/data’, with ‘datadirectory’ => ‘/media/nextcloud/data’,
- Save the config file and close it.
- Stop the Nextcloud Snap
- sudo snap disable nextcloud
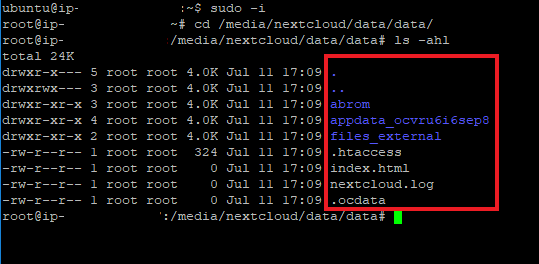
- Move (or copy) the current data directory to the new place- I recommend copying the data first, then you can delete the older data once you confirm everything is working.
- sudo cp -R /var/snap/nextcloud/common/nextcloud/data /media/nextcloud
- Your mounted disk was empty, you can confirm that the data for Nextcloud was correctly copied by looking into the mounted disk
- Re-enable the snap
- sudo snap enable nextcloud
- At this point you should be able to log into your Nextcloud instance and your data will be stored on the attached S3 disk.
Part 3 – Point your domain / subdomain to your VPS
- Go to you domain registrar (i.e. godaddy.com, 1and1.com, etc.)
- Navigate to the domain setting for your domain or sub-domain.
- Create a new A record that simply points your domain / sub-domain to the public IP address of your AWS Lightsail instance. This is what we configured in Part 1, Step 4
- Give this a few minutes and your domain should begin pointing to your Nextcloud instance.
- Note: It’s important to ensure your domain name is a trusted domain within the configuration file. You should include your domain with and without the “www.”. Please refer to Part 2, Step 17.
Part 4 – Enable SSL (https)
- Login your your server through SSH
- Absolutely ensure your domain or sub-domain is listed as a trusted domain (Part 2, Step 17)
- Enter the following command:
- sudo nextcloud.enable-https lets-encrypt
- Simply follow the prompts presented to you.
Done.
At this point you should have a fully functioning Nextcloud installation working with SSL.